
My phone was red hot on Wednesday with messages from Alan asking 'are you dyeing yet?' No, he wasn't wishing me ill, but meanly making fun of my latest interest, fabric dyeing.

The emphasis was on making marks on the surface of the fabric, usually by tying bundles very tightly with string or even sewing the design into fabric, using huge needles. I enjoyed the process, but rarely made anything that was of any use to me. Part of the problem was finding 100% cotton, of the type that was the right weight for quilting. Also to be honest, those marks were fun to make, but had little place in my quilting.
I stopped fabric dyeing (taking up fabric painting instead) through lack of a convenient place to do it. In Africa I had a specially made dye table set up in the car port, where I would spend hours playing away and getting messy. The finished products would sit on the grass and I would look proudly on. Then I'd bundle them up and out them away. I still have some of that fabric!
Oh, and for those of you who are just gagging to know the difference between fabric painting and dyeing. The paints sits on the surface of the cloth, where as the dye sinks into it. The paint affects the feel (or hand) of the fabric, leaving it a bit stiffer. It is set onto the fabric by applying heat in the form of an iron.
Janice and I both signed up for an online course with Jane Dunnewold on Craftsy. I have known Jane as an artist (not personally) for many years. Her book Complex Cloth (which I've owned for about 10 years I guess), is one of those must have books for people interested in the type of stuff I'm interested in. It is still in print, and she recently published a follow up book, which uses more up to date processes I guess.
In addition I have also been looking at the work of other fabric dyers, both on line and via dvds, particularly a British dyer called Myfanwy Hart (Welsh do you think?!), who has a segment on the dvd from the television series, Talking Threads.
I decided to try out both methods, as they took different approaches to dying.
Both dyers use Procion MX dyes. These dyes can only be used on natural fibres, so no sneaking in the polyester here, or you will soon be found out! I am sure nobody reading this (if anyone has actually stuck this far) wants to know about the way the chemicals work. I found it useful however, as it made some things about using dyes immediately clearer. What you do need to know about the dying process using Procion MX is that they are cold water dyes so you don't have to 'cook' the fabric in the dye, there is no steaming or microwaving. You just mix the chemicals, apply and let it do the magic all by itself.
Now I know there is someone out there griping on about the environment and the chemicals. First of all, if you are that worried about the chemicals, get off my blog! Go find a tree hugger who is boiling up some onion skins, for you to dye your goat's wool, home-made socks with. On this blog, we like the CHEMICALS!
Seriously, we are assured that they are safe to put down the drain, and as Jane seems to be a bit of an old hippy with an environmental slant, if she pours hers down the drain, I guess it is reasonably safe for me to do so too.
Oh I should just mention the fabric. If you are going to do this, the finish HAS to be removed from the fabric unless you are using prepared for dyeing fabric (PDF). All those wonderful chemicals they lay on the fabric to make it look wrinkle free and pristine when you buy it, repel the dye (and in fact I guess most things you apply to the fabric surface). I washed my fabric in hot soapy water. Then I read something on the internet about no soap powder. In the end I stuck it back in the machine, on a 90 degree wash, with a few spoons of sodium carbonate (which I'll come to later). Then just dried and ironed it. Again, no fabric conditioner and no fabric sheets in the dryer, as they add water repellant to the fabric surface.
As I was following Jane's method initially, the first thing to do was to manipulate the fabric. One problem immediately became apparent, I only had one elastic band to use for all the manipulations. Those things are usually all over the place but of course, none to be found when you want one. I resorted to string (as I had used in Africa), which is really hard on the skin, as it has to pulled really tight.


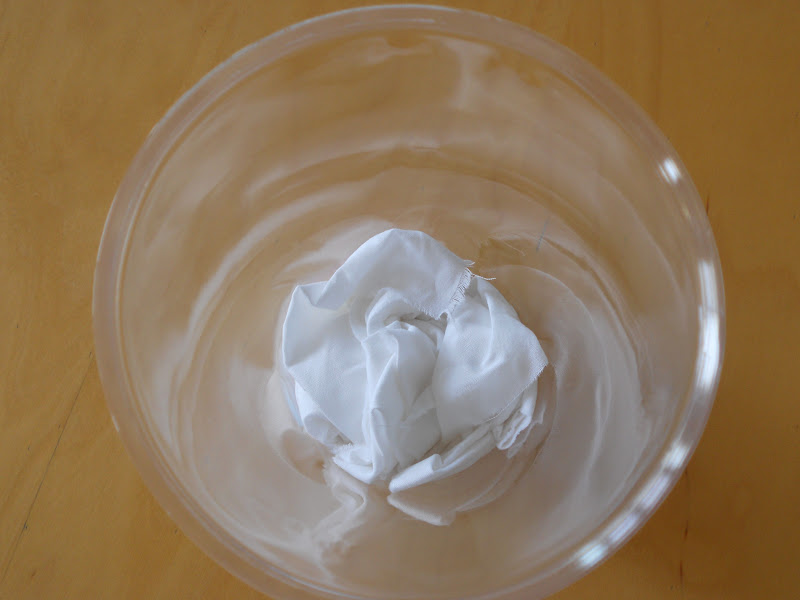


Next I moved on to scrunching fabric for Myfanwy's dye method. I used slightly bigger pieces of fabric and stuffed them into the beer glasses. And this is where I then got stuck for ages. The dvd didn't tell you how much dye to use, what measure etc, so it took me most of the morning to work this out. Actually, I couldn't work it out, so I guessed. Well, that is the good thing about experimentation with small bits, it doesn't feel quite so bad if it doesn't go to plan.
The Myfanwy method, was to make a small graduated colour series of scrunched fabric, which would make three pieces in one colour way, and three in another. Plus a few left over pots, which I lost the focus of, so became mini dumping grounds!

To dye fabric you need the dye to add the colour, and a chemical which is usually called soda ash, to make the dye adhere to the cloth. You can't dye without those two things. Soda ash is sodium carbonate. Washing soda that doesn't contain bleach, is the same thing (I think!). I obtained sodium carbonate by going to a store that sold chemistry equipment and supplies to schools. The soda ash and salt are added in equal parts, to warm water and mixed, to obtain the chemical water.
The big difference between Jane and Myfanwy's dye method, is that Jane mixes the chemical water with the dye, where as Myfanwy mixes the dye with water, and then after putting the dye on the fabric, she covers it with the chemical water.
For Myfanwy's technique, I scrunched 9 pieces of fabric fairly tightly into cups. I numbered them 1-6 and A-C. Not knowing how much dye to use, I used 1/2 tsp of cobalt blue dye and mixed it with water to the level of about 3/4 of the measuring glass. I divided that in half with another glass and threw that half onto glass A. I topped the remaining dye in the measuring cup with water, to the original mark and divided it in half again. I poured that half on cup 1 and again, topped up the measuring glass with water. I did this for glasses 1-3. I forgot where I was supposed to put the remaining dye, so I threw it in one of the A-C glasses! I did the same thing with the lemon dye, putting it into the same cups. However I started at cup 3, putting full strength lemon dye onto the weakest blue dye, ending in cup 1, where I put the weakest lemon dye onto the strongest blue dye. The remaining dye was again, thrown into one of the A-C beakers.
The whole sequence was repeated again, for glasses 4-6 using blue, and then from 6-4 using fuchsia. Again, the remaining dyes were poured into the A-C glasses. As the A-C glasses were getting quite full, I threw the remaining dye that didn't fit into those glasses into the big plastic box, which had the spare fabric. The were all topped up with chemical water.

The fabrics were left in the dye bath for 24 hours, though you can withdraw them from after about 4 hours.
When I undid the fabric that I had dyed using Jane's method, I found as I had predicted, they did not have very strong patterning lines, except the bibbly-bobbly piece, which came out really well. The colours were really strong and bright.


The graduation dyes were a surprise to me. I had somehow expected them to be very weak, but on the contrary, they were also very strong colours. In fact, given the hours I had to stand and wash them out (yes hours!), I think I had too much dye in them. Also, I didn't have the last chemical which is used in the dye wash out and that can help with the bonding of the dye. Surprisingly it wasn't the red dye that had the wash out problem, but the blue. I gave up in the end and put them in the washing machine with a colour catcher. Judging by the colour of the water, there was way too much dye in them. I suppose it may also be possible that the chemical water wasn't strong enough.
The colours don't look strong, but that is my camera, rather than the fabric.


In total I dyed three yards of fabric, which wiped out my remaining white cotton stash, so I'm trying to get Alan to go to Chinatown with me to carry either a bolt, or at least 10 meters. Hum, wish me luck on that one!
I did the dying in my studio but had to keep running to the kitchen to wash out pots, get fresh water etc. I didn't want to go near the porcelain bathroom sink with the dye, just in case it stained. It was a lot of running around in some ways, but worth it I think. So, it is possible to dye with minimal space, you just have to be careful. Personally I wouldn't dye in the kitchen, as I'd be worried about the dye powder being loose there. I think a lot of people dye in their bath. In the summer, you can dye in the garden. I think once you are at the washout stage, the dye is supposed to be exhausted, and there isn't any actual powder flying around, so it is a lot easier to do that bit in the kitchen.
I made a dye worksheet book, based on the worksheets in the book Hand Dyed Fabric Made Easy, by Adriene Buffington.


So, go forth my friends and DYE!
Kim, It looks as if between you and Jane I will
ReplyDeletehave a great dyeing experience when you arrive.
We'll be setting a table up in the back yard for our "Dyeing in the Garden" adventure. I can hardly wait! Janice